

VirtualBox: Windows Host

Image credit: keypuncher staff
My go to Virtual Machine is VirtualBox. It’s not as spiffy as VMWare but it’s free and powerful.
Host vs Guest VM
A page that used to exist on the Internet but now longer exists stated:
The host operating system is software on a computer that works with the underlying hardware. The term is typically used when differentiating from the guest operating system used in a virtualized server.
We are going to install a Linux guest OS onto a Windows host OS. I will use Windows 10 as my host and Ubuntu 18.04 as my guest.
Step 1: Download VirtualBox
In Windows, navigate to the VirtualBox website. I’m going to be using VirtualBox 6.1.18. In your favorite browser navigate to the downloads page and click on “Windows hosts.” This should bring up a dialog that looks something like this:

Install VirtualBox with the default settings.

Make sure you find the icon that lets you make changes to Windows. It has a shield icon on the taskbar and was hard to find the first time I ran the installer.


It’s OK to install the Oracle Network interfaces:

Make sure to:
allow virtualbox to allow changes to your device
allow the Oracle USB driver to install
to install the Oracle network adapters and the Oracle network service


After installing, run VirtualBox. It should be under “Oracle VM VirtualBox” in your Start menu. To access the Start menu, click the window icon in the lower-left corner of the screen.

Step 2: Install Ubuntu Inside VirtualBox
Point your browser at ubuntu.com. As of this writing the latest version is 20.10, but I’m using Ubuntu 18.04. You’re free to use whatever version you like. To use the version I did, use this link.
Then select “Machine > New…” inside VirtualBox.

Set the guest OS type:

Specify the amount of memory to allocate to the guest OS. I’m allocating 4 GB.

Create a virtual hard disk to store your files in your guest OS.

In this guest I’m using VDI.

I’m using a dynamically allocated disk.

I’m allocating 25 GB for my virtual disk.

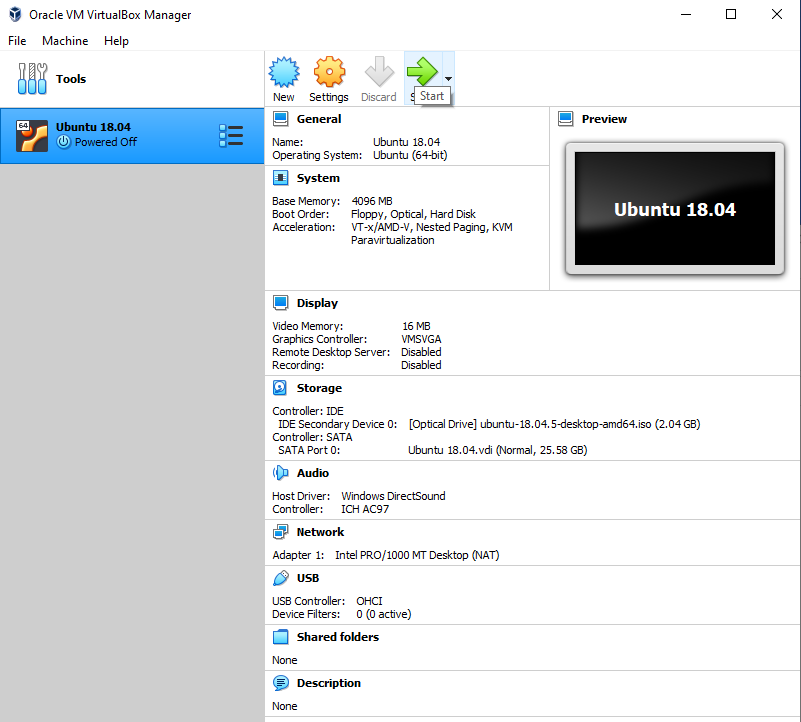
With that we are all finished with the new virtual machine wizard. Your new VM should look something like this:

Remember downloading Ubuntu before? This is where we specify its location. Right click on Storage (IDE Secondary Device) and specify an optical drive by clicking “Choose a disk file…”

This brings up the following dialog. Click “Add Disk Image.”

Select the image of Ubuntu downloaded previously. Here you see it in my Downloads folder.

Now there should be an Optical Drive in the IDE controller of the Storage section.
Step 3: Start Ubuntu In VirtualBox
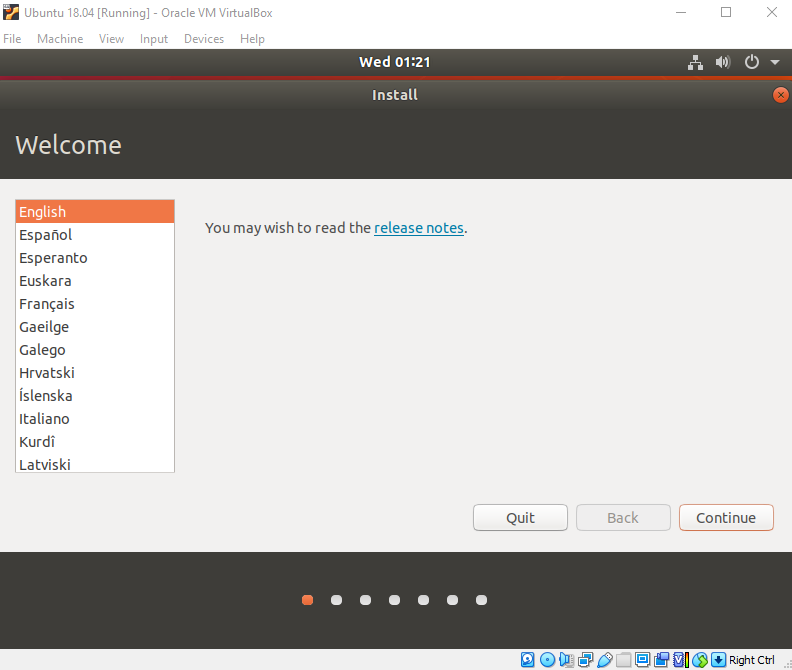
Now we are ready to fire up Ubuntu on our Windows Host! Click “Start” with the green arrow next to it. Ubuntu will probably take a few seconds to initialize and then you should see this screen. Choose your desired language.

Then use the arrow keys and select “Install Ubuntu.”

Ubuntu will begin installing.

Select the desired language one more time.
I installed with the following options:

Don’t be afraid to erase the entire disk. It’s only going to erase this disk inside the VM.

Yes, you really want to overwrite the disk.

Now enter a username and password. Remember this password!

Ubuntu will begin installing inside the VM.

The installation will run for several minutes. Then you will be met with this screen. Just click “Restart Now.”

We can’t very well remove the installation media from a “virtual” drive so just press enter.

Congratulations! You’ve just installed a virtual machine!
Step 4: Post Installation
I like to run through some steps after I finish installing. First, log in.

Ubuntu will be way out of date despite the advertised promise to install updates. Install these updates then restart the VM.

Next I like to remove Thunderbird mail because I don’t use it anyway. Right click on it and remove it from favorites.

In the lower left corner there should be an icon with 9 dots. Click it.

This should allow you to search for applications.

Type “terminal” in the search box.
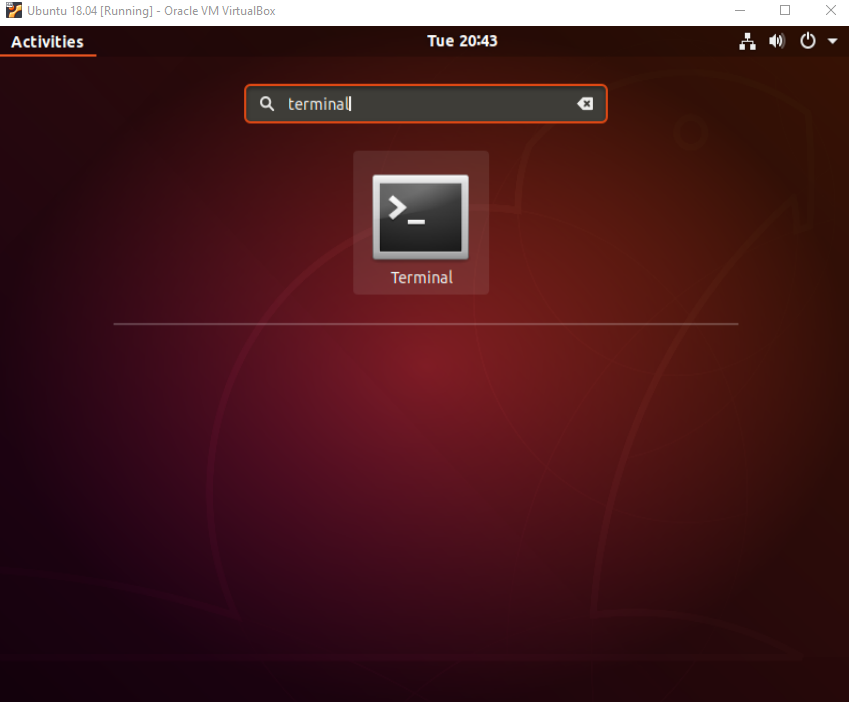
Right click on the Terminal application and click “Add to Favorites.”

This should result in a Terminal icon getting added to the left bar.
